Changing Presenter Language When Streaming
Intro
The Presenter Language (also called “Streaming Language”) is initially set up when adding a session. However, it’s possible to change it during a stream if necessary.
The method of changing the Presenter Language is different depending on how audio is being sent to Wordly:
-
If audio is being sent to Wordly via Zoom or RTMPS, you must select and toggle the streaming language in your Wordly Portal. See Changing the Presenter Language in Wordly below.
-
If each speaker in your meeting is sending their audio to Wordly via https://join.wordly.ai, then see “Join Instructions” below.
-
If audio is being sent to Wordly via the mobile app, see “Mobile App Instructions” below.
Changing the Presenter Language in Wordly
-
With the session in progress, Go to Wordly’s Sessions page and use your meeting’s session ID to locate the session. Click on the black gear button to open the Live Session Controls box.
-
Click Change Streaming Language and select your desired language from the drop down menu:
-
Click Change when finished:
If successful, a green SUCCESS box will appear briefly in the top-right corner of the screen. See the below image:
Note
Clicking change must be done at least 2 seconds before your speaker begins talking in that language.
Switching languages
When you add a language to a session, a blue toggle button with the language you just added will appear within the Live Session Control box.
To switch between languages, simply click the blue toggle button of the language you want to use at least 2 seconds before a presenter begins speaking in that language. See the image below:
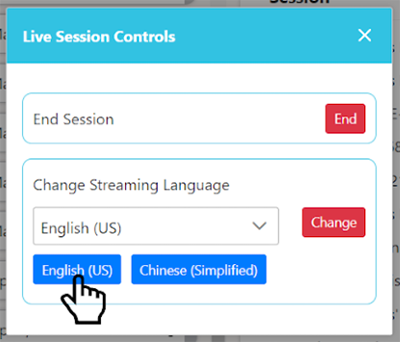
You can add as many languages as you like to a session, and Wordly will create a blue toggle button for each language.
To add new toggle buttons, you’ll need to select a language from the list and click on the red Change button:
Once you click on the red Change button, the new language will take effect 2 seconds later, and you’ll have created a new blue toggle button for that language. See the image below:
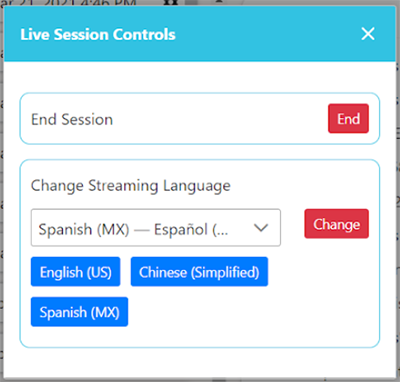
Changing the Presenter Language in Wordly Join
-
Once you join an active session through a Wordly Join link (https://join.wordly.ai), you’ll see a screen similar to the one below. In this example, Worldy is currently expecting the presenter to speak in English:
-
To change the language Wordly expects to hear, click on the triangle button to the immediate right of the current language, as seen below:
-
This will open the dropdown menu of available languages. Select the language you want to speak.
Note
You can also click on the “down” arrow button on the far right side of the screen. This will open a new row that includes the two languages most recently selected, which you can toggle between. -
Confirm that your preferred language is now visible at the top of the screen, as seen below:
Mobile App Instructions
-
Open the Wordly mobile app and start a session or join an existing one. You’ll see a screen like this:
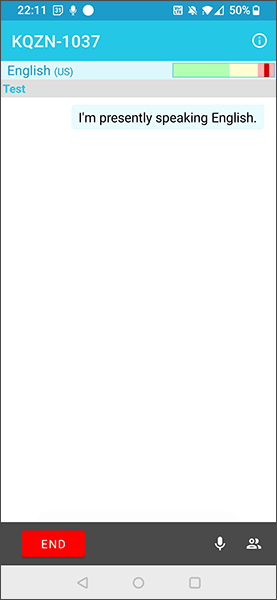
-
Tap the named language (“English (US)” in this example) near the top left corner of the screen. This will open the language menu at the bottom of the screen, as seen here:
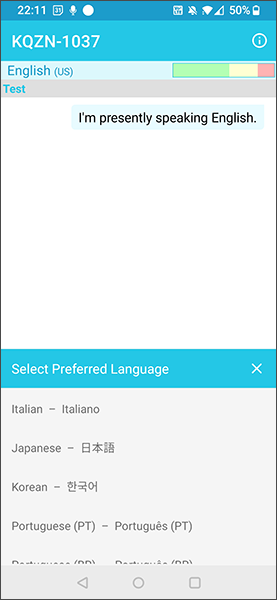
-
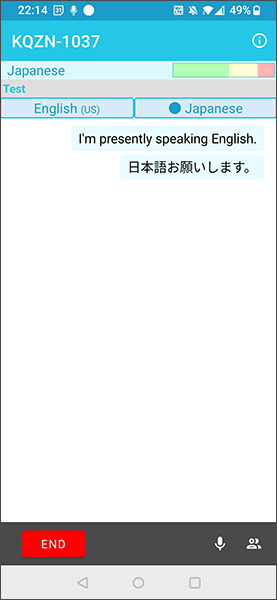
Tap on your preferred language. In the example below we’ve selected Japanese, which now appears in the top left corner as the active language. Wordly will now translate what speakers say into this chosen language:
-
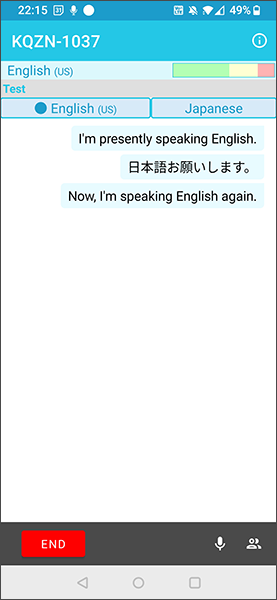
To switch back to your initial language, tap the blue button with that language near the top of the screen. As you switch languages, up to 3 buttons can be displayed. In this manner you can switch between your preferred languages rapidly. In the example below we’ve switched back to English (US).
Note
The currently active language is indicated with a blue circle.
Feedback
Was this page helpful?
Glad to hear it! Please tell us how we can improve.
Sorry to hear that. Please tell us how we can improve.