Adding Glossaries
Glossaries allow you to customize Wordly’s speech recognition to include your organization’s unique terminology, such as the special phrases or names of products, people, and departments. Glossaries are custom libraries which significantly increase the accuracy of transcription results. Without a glossary for reference, Worldly may be unable to transcribe unique phrases, words, and terminology.
It’s possible to create multiple glossaries for specific uses (such as IT, research, regional sales teams, etc).
Tips
-
Glossaries increase the accuracy of transcribing spoken words into text.
-
Make sure your presenter has a quality microphone. The more clear the audio, the better the transcription.
-
Glossary terms should be as concise and unique as possible for best performance.
-
It’s important to add words, phrases, terminology, names, acronyms, and abbreviations as you expect them to be spoken aloud naturally.
- For example, in the real world, the presenter isn’t likely to say “FBI - The Federal Bureau of Investigation”, so to transcribe this properly, the glossary should just include “FBI”.
Creating a New Glossary
To access the Glossaries page from anywhere within Wordly:
-
Move the mouse cursor to the left side of the screen
-
Click on Glossaries (
):
Once you’re on the Glossaries page, click +Add Glossary (  ) to get started. This will open up the following menu:
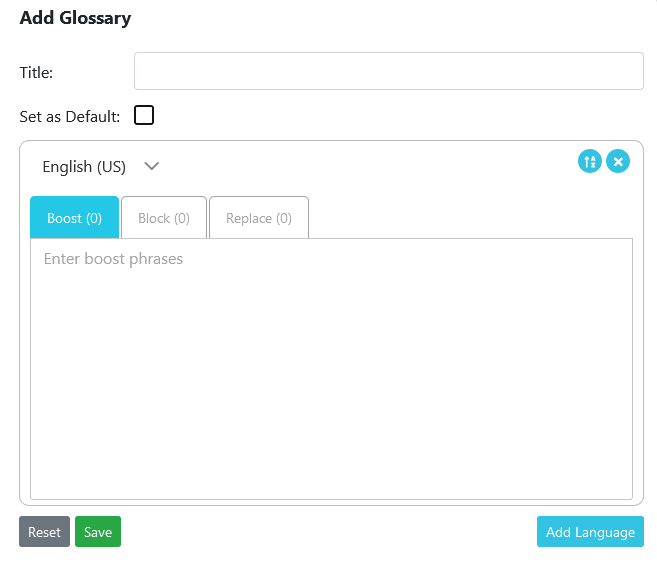
Enter the following info to create a glossary:
Title
Enter the name of your Glossary. A title is required to save the glossary.
Note
Make sure to only check the “Set as Default” box if you intend on using this glossary often.Phrase Box
Language
Choose the language that the presenter will be speaking in.
Boost
In the Boost tab (  ), add the phrases and terminology that you think Wordly will need help with transcribing. This can include names, acronyms, terminology, and abbreviations, but must be added as they’re spoken aloud naturally.
-
One term per line. You must add a line-break (press “Enter” on your keyboard) before adding another term.
-
Glossaries can contain up to 3000 individual terms.
-
One term can be up to 100 characters.
-
It’s possible to copy and paste a list of terms into the “Phrases” box, as long as they’re separated with line-breaks.
Names
Include names that you’re unlikely to find in a dictionary. This includes:
- People’s names
- Organization names
- Place names
- Product names
- Department names
Terminology
Include terminology that is “specialized”, such as:
- Industry jargon
- Organizational terminology
- Departmental terminology
Acronyms
Acronyms should be included on their own, without their meaning. Examples:
- FBI
- CIA
- STD
- DARPA
- NATO
Abbreviations
Abbreviations include two-letter acronyms that are spoken aloud, such as:
- AI - (Artificial Intelligence)
- IT - (Information Technology)
- ID - (Identification)
- EG - (Exempli Gratia or “for example” )
- IE - (“In other words” or Internet Explorer)
- VR - (Virtual Reality)
- AR - (Augmented Reality)
- ER - (Emergency Room)
- RV - (Recreational Vehicle)
Note
Only include abbreviations you expect will be spoken aloud as abbreviations. For example, we can expect people to say “Nevada” and not “en vee” (NV), so “NV” should NOT be included.
However, we can expect people to say “vee are” (VR) instead of “Virtual Reality”, so “VR” should be included.
Whilte the examples above include parenthesized phrases like “(Artificial Intelligence)” do not include these in the glossary. Only include phrases people are likely to say exactly like the phrase.
Emphasis
Emphasis can improve the accuracy of Wordly’s transcription quality by expanding how the sounds that make up a word are processed.
To add emphasis to a word, enter the word into the phrases box, add a space after the word, and either 1 or 2 exclamation marks. See the following examples:
- Wordly !
- Moishe !!
- Acetaminophen !!
- Parasetamol !
- Chevrolet !
- Porsche !!
If a word isn’t being transcribed correctly, try emphasizing it with 1 exclamation mark initially. If it still isn’t being transcribed, use 2 exclamation marks.
Wordly will prioritize the correct transcription of emphasized words over non-emphasized, similar-sounding words. For example, “Porsche” might be mistranscribed as “porch” if the word isn’t emphasized.
Warning
Emphasis should be used sparingly, and only for words that are either critically important or for words that can be anticipated in advance to cause problems with transcription efforts.Using multiple languages
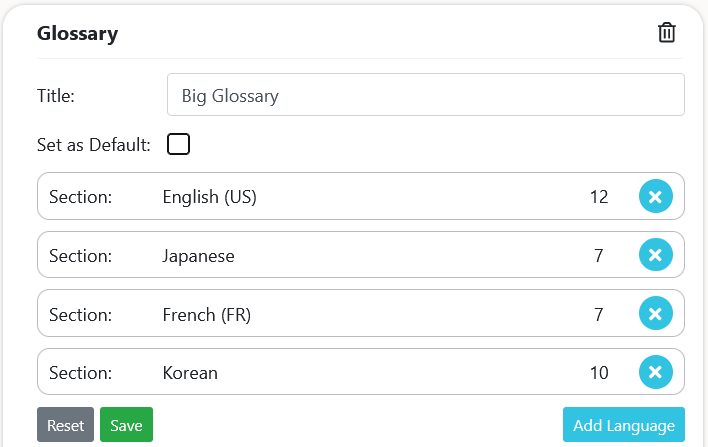
To include terms in more than one language, click Add Language ( ). This will automatically collapse the current “Phrases” box and create another. See the example of what that looks like here:
-
Click on any of these Phrase boxes to edit the list of terms for that language.
-
To remove one of your languages from a glossary, click the X (
 ) next to it.
 -
Click the alphabetize button (
 ) to automatically alphabetize all the terms in the phrase box.
Warning
-
Clicking the reset button (
 ) will delete everything you haven’t saved from the glossary.
 -
If you’re adding items to an existing glossary and click reset (
 ), only the new items will be deleted.
This action can’t be undone at this time.
When finished, click the Save button ().
At this point your glossary will be saved, and you’ll be able to include it when adding a session.
Creating and Using a Blocklist
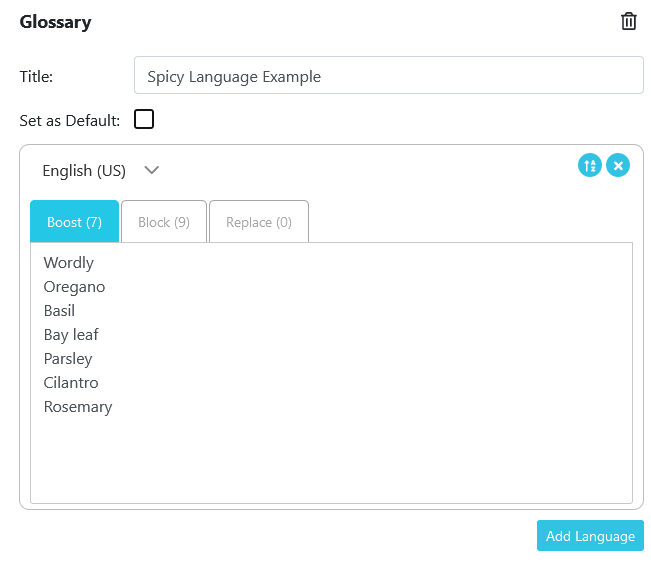
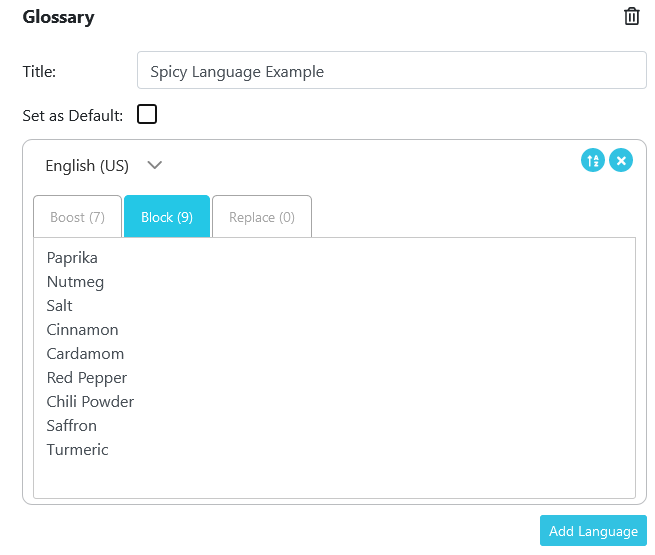
Blocklists are the inverse of Boosted phrases in that these are lists of words that you want Wordly to avoid. For example, suppose you want to block spicy words like “paprika” or “turmeric”. You can add them to your glossary’s Blocklist as shown below. Should a “spicy” word be spoken during a session, it will not appear in the transcript.
-
In Glossaries (
), select your glossary.
-
Click the target language section to reveal your word lists. There will be three tabs: Boost (
 ) Block (
  ) and Replace (
  ).
).
-
Select the Block tab.
-
Click inside the box to start typing words you do not want Wordly to transcribe. Each word or phrase should be on its own line.
- Press Save (
 )
)
Remember to select the desired glossary when creating a session. As long as your glossary is selected, the Blocklist will work just as the Boost list.
Adding Replacement Words
AI can often misconstrue words. To help create the smoothest translations, Wordly’s Glossary now offers word replacement along with the Boost and Block
For example, if talking about a 4D experience you might type “forty -> 4D” to make sure 4D is not recognized and translated as forty. Names can also sometimes cause issue. For example, with the last name Firby, you’d want to avoid it getting recognized as the toy Furby, and thus, should add “furby -> Firby” to your replacement list.
-
Open Glossaries (
) and select the desired glossary.
-
Click the Replace tab (
 ) and click in the text box.
 -
Write the word you do not want, type “->”, then write the word you do want to appear instead. Note: Without the “->”, an error message will appear in red below the text box.
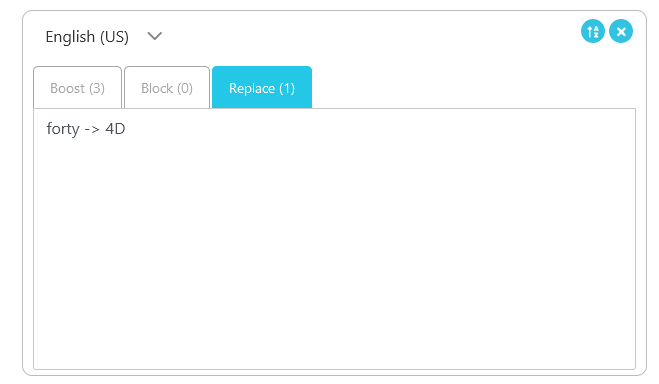
- Press Save (
 ) to save your work.
Customizing Translations Through Word Replacement
You can use the Replace function to customize translations. Whereas the Boost function nudges Wordly’s translation software, replacing will force the text into one translation as opposed to another.
In your Glossary, select your target language, go to the Replace tab, and write a rule to replace the unwanted translation with the desired translation.
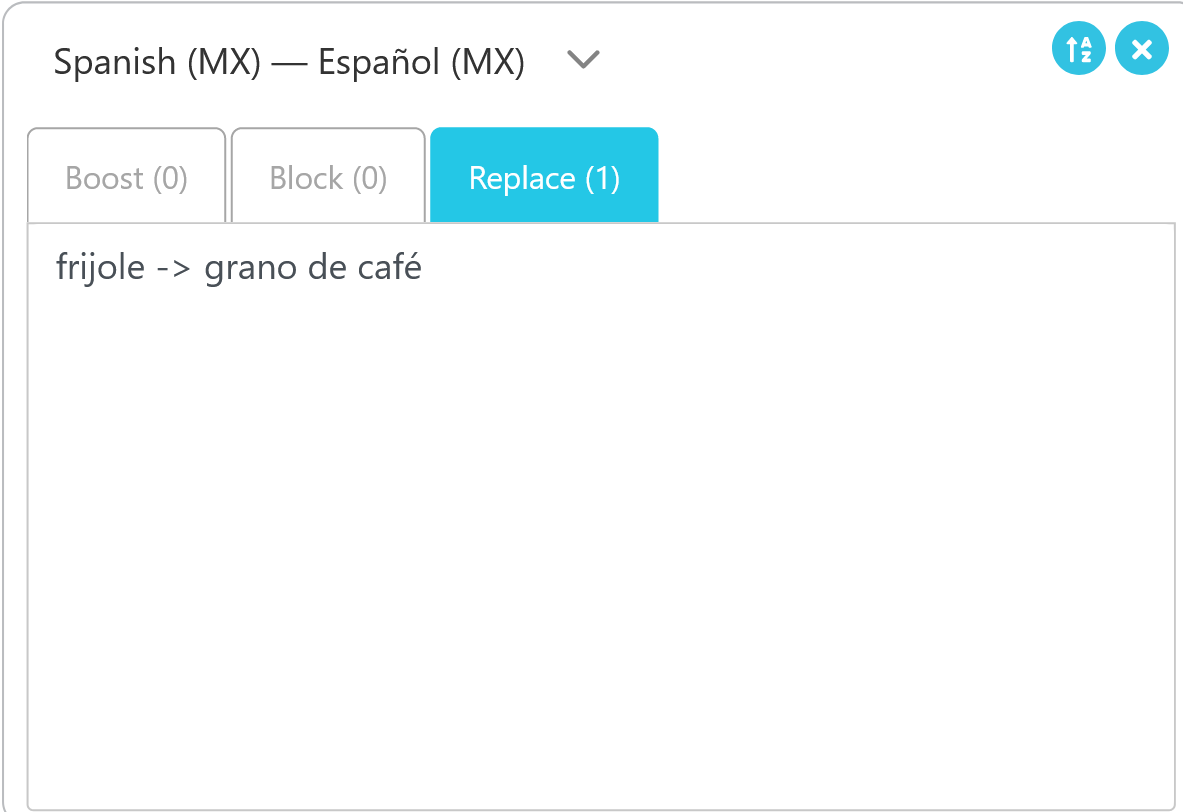
For example, if you are talking about coffee, you might want to for the word “bean” translates to the correct sort of bean.
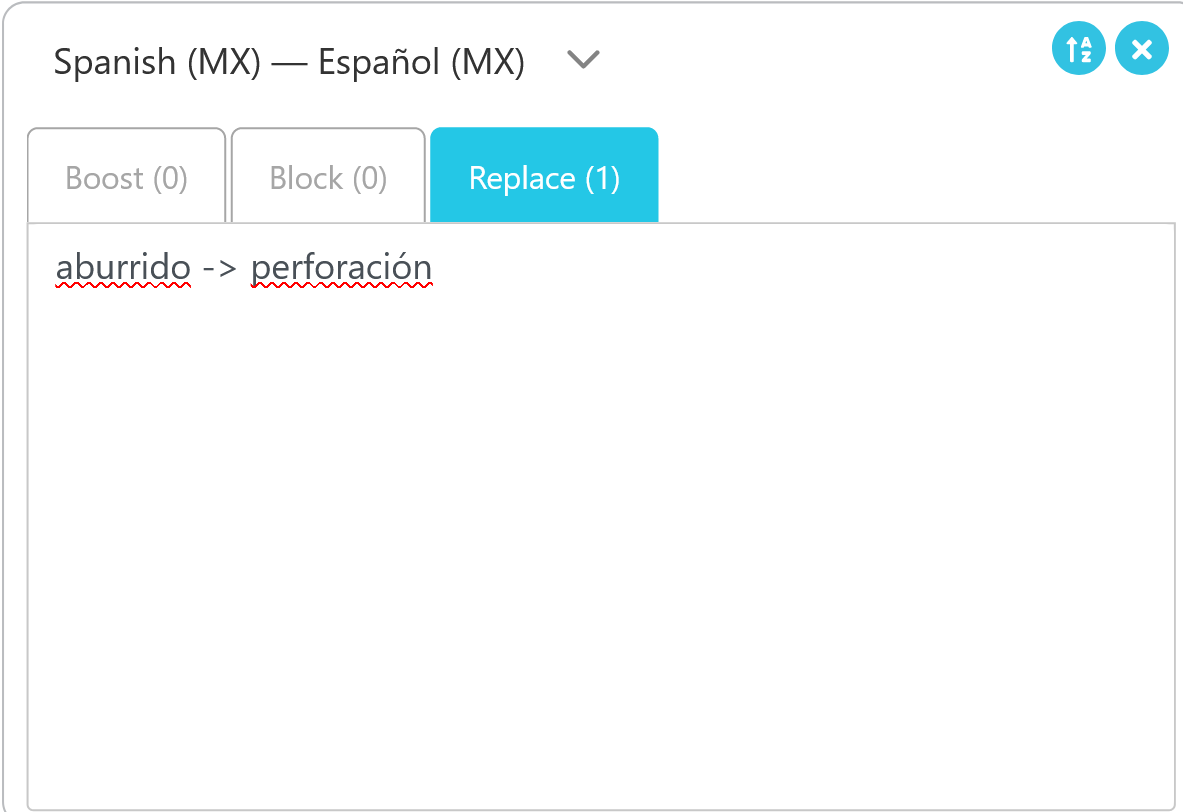
Another example would be if a geologist needed to talk about boring holes and wanted to assure that “boring” was not translated as the more common meaning of tedious or dull.
Note
Keep in mind that Replace will always do this replacement, even when a different translation would be better.Do Not Translate
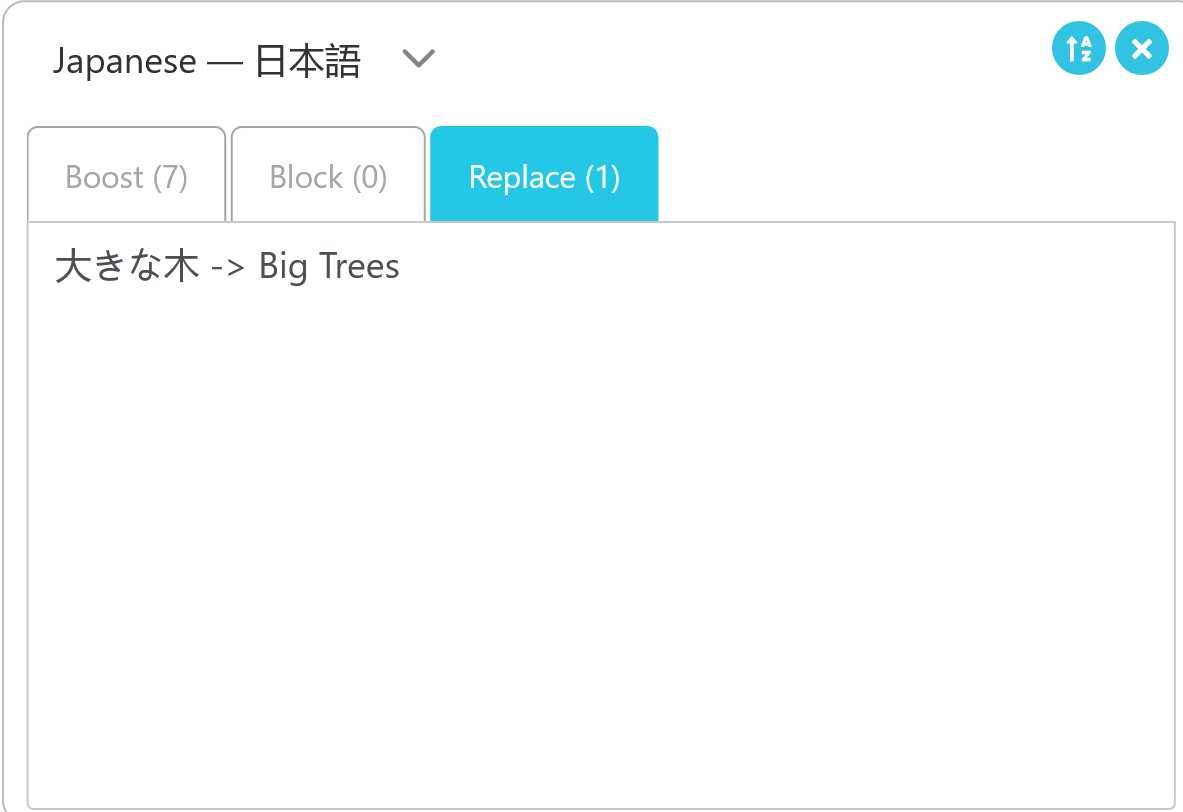
If you do not want a term translated, you can write a rule to replace the unwanted translation with the non-translated text. For example, if your company is named Big Trees, you wouldn’t want that translated literally.
Sharing Glossaries
You can share your glossary with other Wordly users.
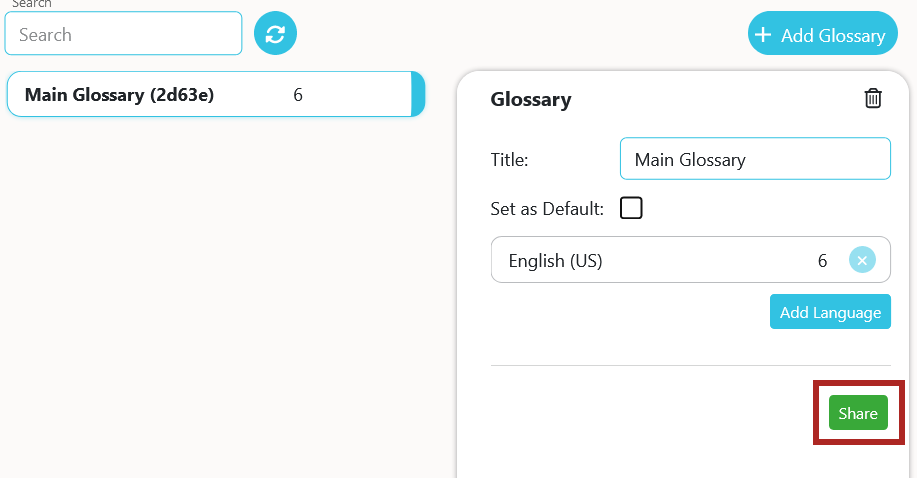
Go to your Glossaries page, select the desired Glossary, and press the green share button at the bottom.
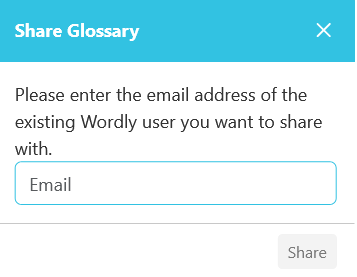
In the pop-up box, enter the email address associated with the Wordly account with which you are sharing your glossary.
Note
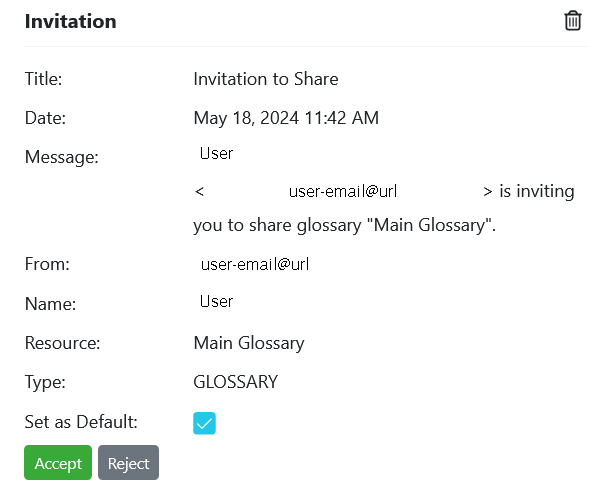
Notify the person(s) you are sharing your glossary with, as they will not receive an email notification.To accept the shared glossary, the user will see a  on their Wordly account. Navigating to the notification center, the invitee will be able to accept your Glossary.
Set as Default
If the “Set as Default” checkbox is selected when accepting the shared Glossary, will set the Glossary as the user’s default Glossary. Unchecking the box will leave the user’s defaults as-is.
Feedback
Was this page helpful?
Glad to hear it! Please tell us how we can improve.
Sorry to hear that. Please tell us how we can improve.