Webex Support and Wordly
Wordly can be seamlessly integrated into Webex to enable meeting and Webinar attendees to participate in the language of their choice. Follow the instructions below to integrate Wordly into your Webex platform.
This guide covers:
- Configurations of your settings on Webex
- Initiating Wordly from a meeting or Webinar
- Displaying real-time translation or transcription
- Hearing audio in translated language
To use Wordly with Webex, you’ll need the following:
-
A Wordly account with available minutes.
-
A valid Webex account with administrator credentials. These are necessary to enable features on the Webex platform. (Contact your Webex administrator if you have any questions or need permissions on your Webex account).
Setup
Step 1 - Create a Wordly session
Create a session on the Wordly Portal for the same time as your meeting/webinar. If you’re unsure how to create a session, check out the Adding a Session article first.
Note
Make sure to set the language of the session to the same language the presenter of your meeting/webinar will be speaking.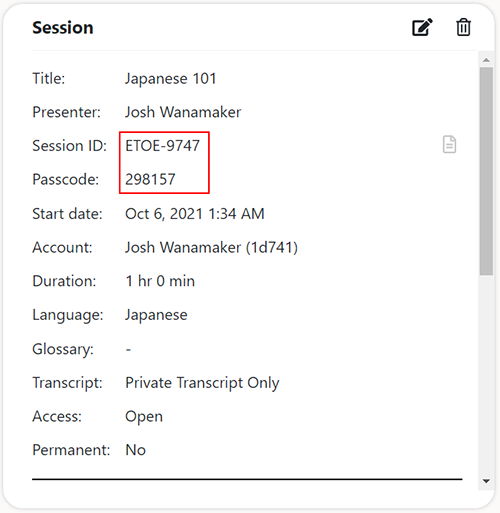
Step 2 - Enable “Other Streaming Services” in Webex
-
Sign in to your Webex account as an administrator.
-
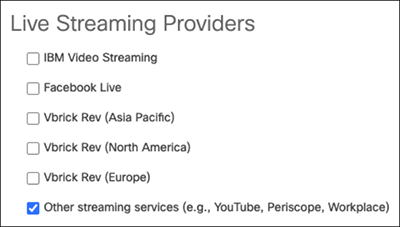
Navigate to Common Settings > Site Options > Live Streaming Providers and check the Other streaming services box:
Step 3 - Enable “Live Streaming” in Webex for individual users
Check out the section at the bottom of this Webex support article to learn how to enable live streaming for individual users.
Step 4 - Start your meeting or Webinar
Step 5 - Start “Live Streaming” for your meeting
-
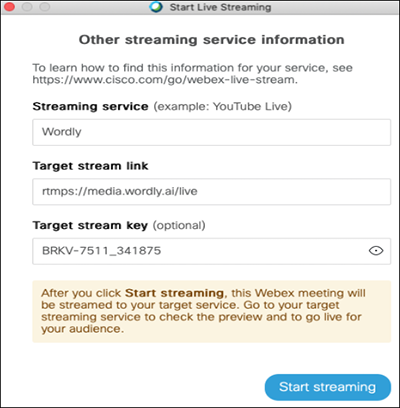
When you initiate Live Streaming in Webex, a window will appear asking for service information for “Other streaming services”. Enter the following info:
- Streaming Service: Wordly
- Target stream link: rtmps://media.wordly.ai/live
- Target stream key: Wordly Session ID_Wordly Session Pass Key. See the following Example: ETOE-9747_298157
-
Click on Start streaming.
-
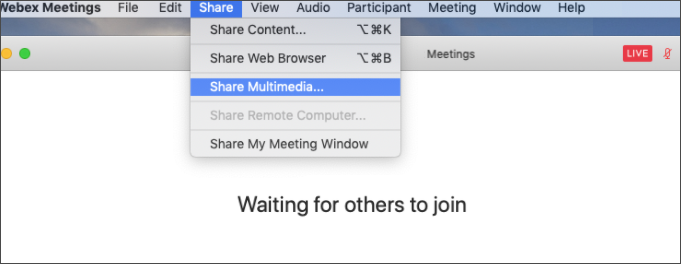
Select Share > Share Multimedia from the Webex menu:
-
Enter the following URL to share : https://attend.wordly.ai/enter/SESSION-ID
-
The audience can now pick the language of the translation they see by clicking on gear button (
) and selecting a language:
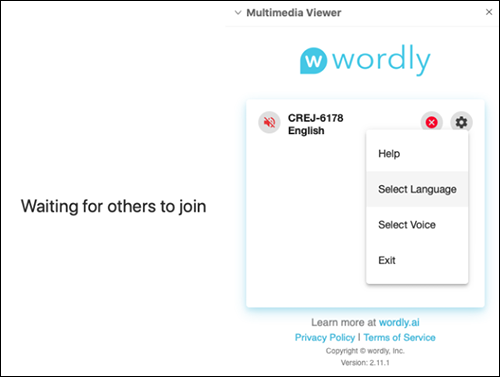
Setting a language for the audience
Follow the steps below if the audience wants to hear the translation in a specific language.
-
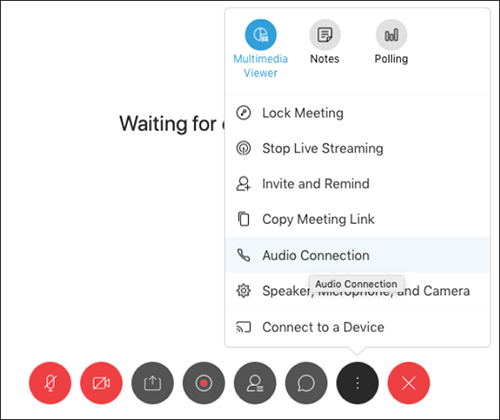
In Webex, click on Multimedia Viewer and select Audio Connection:
-
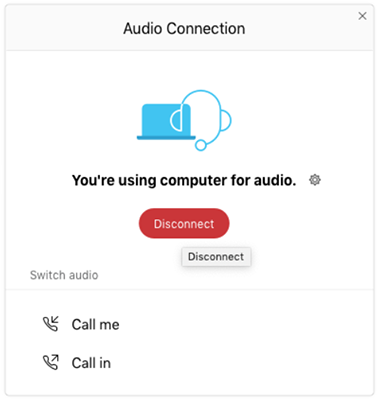
Click Disconnect:
-
Unmute the speaker icon on the Wordly multi-media window
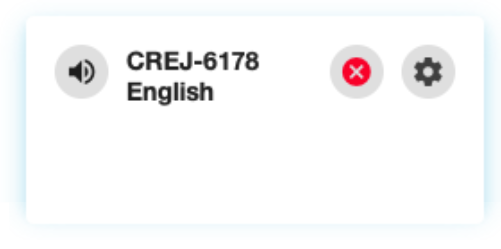
Users should now be able to hear the translated audio.
Known limitations:
-
All meeting conversations should happen only in one language.
-
Translation quality will be significantly affected if people speak in a language other than what is selected by the host as the default language for the meeting.
-
There is an inherent delay between when a speaker completes a sentence and the sentence being correctly translated into another language.
-
Transcripts are only accessible to the host and in the default language the meeting is hosted in.
Feedback
Was this page helpful?
Glad to hear it! Please tell us how we can improve.
Sorry to hear that. Please tell us how we can improve.