Host Setup and Settings
Additional configuration is necessary if you wish to host Wordly translation sessions for your meeting participants. Specifically, you need to:
- Link your Wordly App for Zoom to your Wordly account.
- Enable “Live Streaming” in your Zoom account.
Link With Your Wordly Account
You must link the Wordly App for Zoom with your Wordly account if you want to host Wordly translation sessions during your Zoom meetings. Only a host with a linked Wordly account and enough available Wordly minutes can start a translation session.
Attendees in your meeting can join your translation session and experience translations through the Wordly App for Zoom without needing an account.
After installation, the Wordly app will offer various options for linking with your Wordly account. Not all options may be shown.
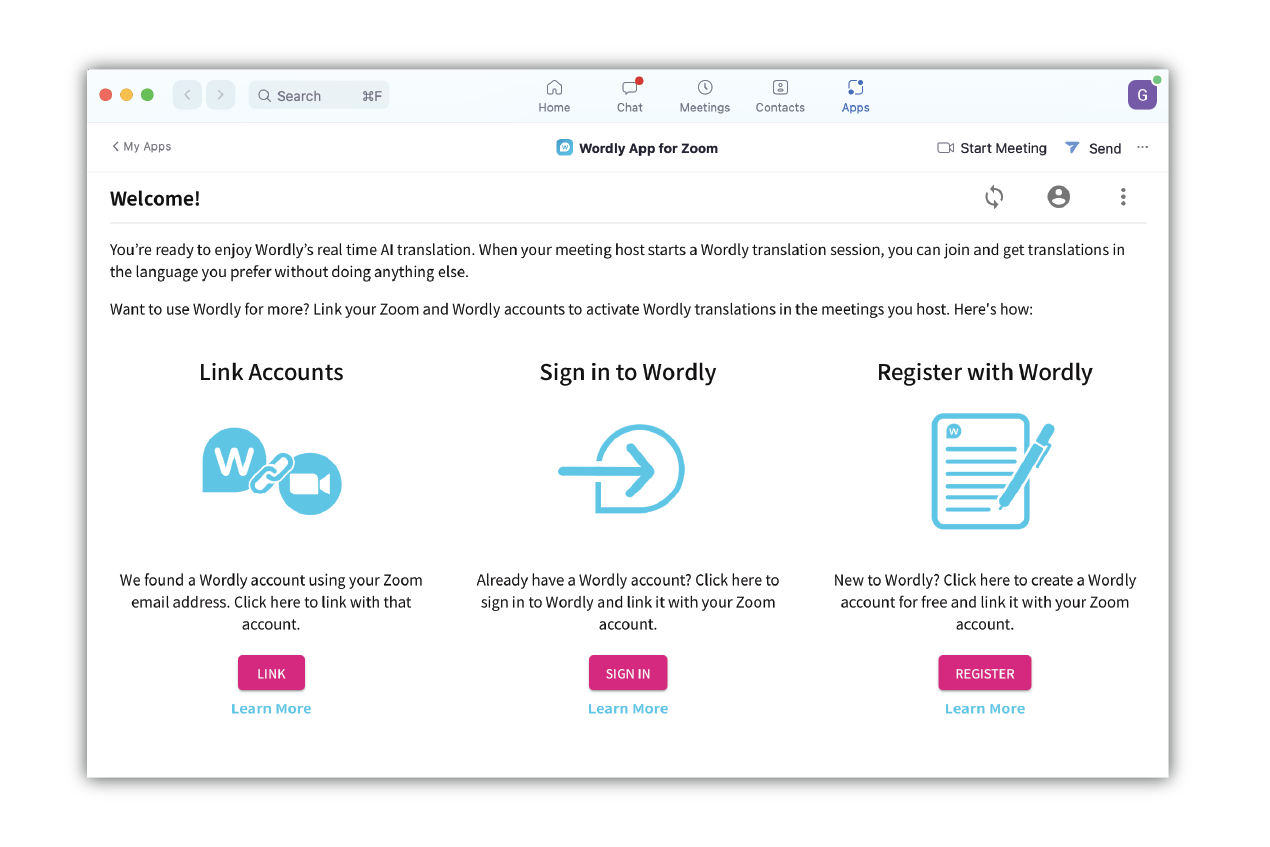
Link Accounts
If the Wordly App for Zoom detects that your Zoom email address is being used by a Wordly account, the “Link Accounts” option will be offered as a quick way to link that account.
Just click the “Link” button and the Wordly App for Zoom will do the rest.
Sign in to Wordly
If you have a Wordly account but it uses a different email address, then you will have to sign in to that Wordly account so that the Wordly App for Zoom knows which account to use.
Clicking on the “Sign In” button will open the Wordly login page in your Web browser where you can sign in normally. Once you have signed in, Wordly will link your account and return you back to Zoom.
Register with Wordly
If you are new to Wordly, congratulations! You have found the best way to empower participants from around the world with realtime translation in Zoom meetings.
To begin hosting Wordly translation sessions, you will need to register for a Wordly account. Don’t worry, it is free to sign up, and you will get some free Wordly minutes for your first meeting.
Clicking the “Register” button will open the Wordly registration page in your Web browser where you can create a new account. Wordly will then setup your new account, link it with the Wordly App for Zoom, and then return you back to Zoom.
Enable “Live Streaming”
The Wordly App for Zoom will need access to the audio from your Zoom meeting so that it can listen to the speakers and translate what they are saying for the other participants.
The app uses the “Live Streaming” feature in Zoom to access your Zoom audio. Therefore, you need to enable Live Streaming before you can host your first Wordly translation session.
To enable Live Streaming:
- Sign in to Zoom and go to your settings.
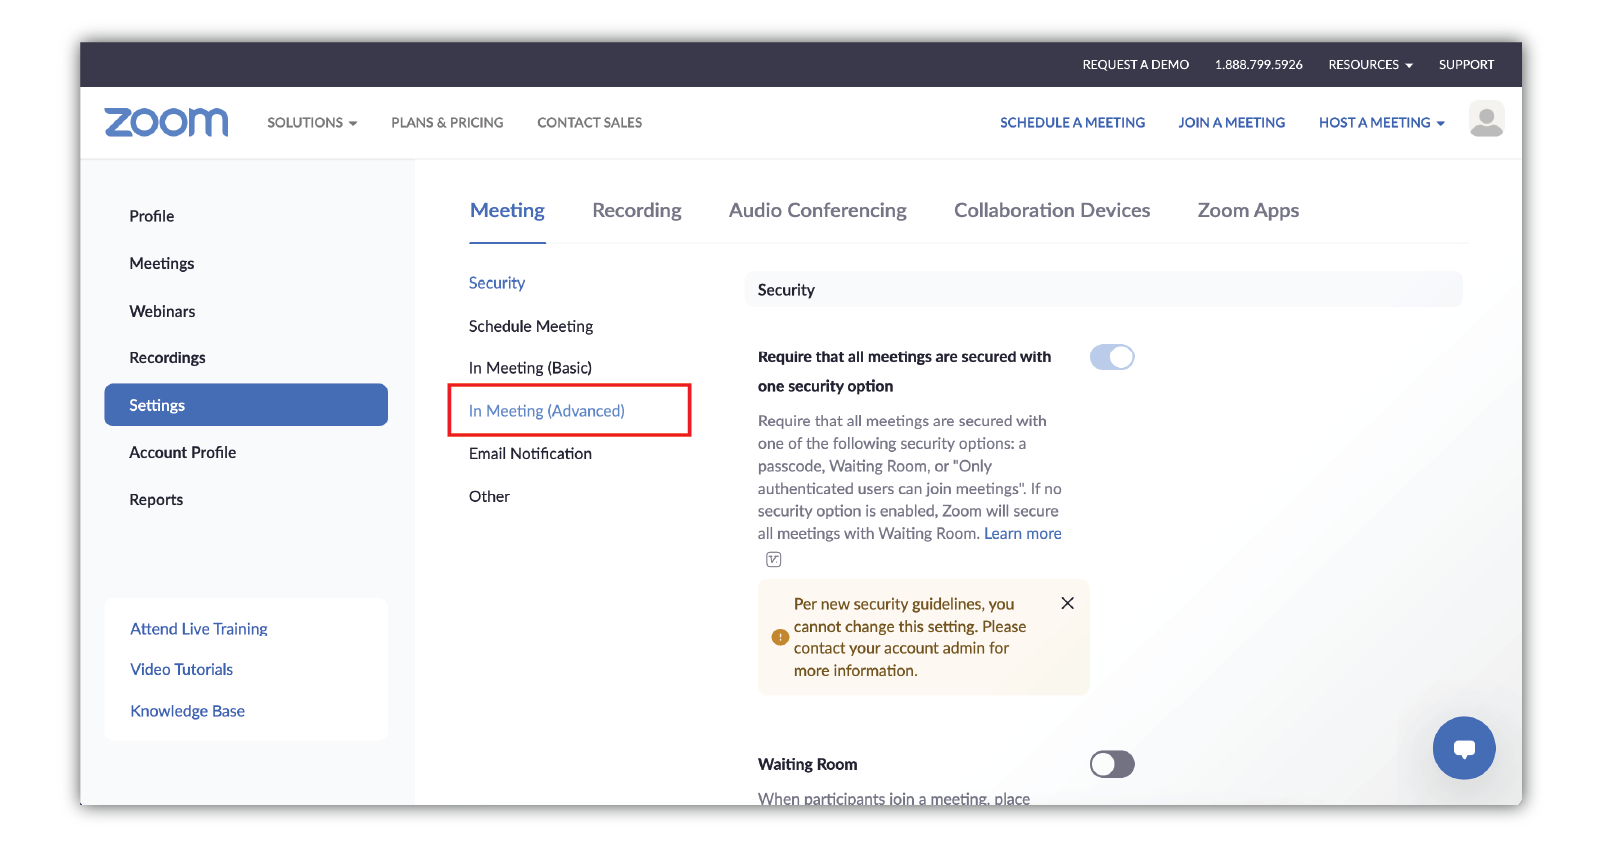
- If you are starting on the Zoom Website, this will be under “Personal » Settings.”
- If you are starting from Zoom, this will be under “Preferences » General » View More Settings.”
- Scroll down and look for “Allow Live Streaming.”
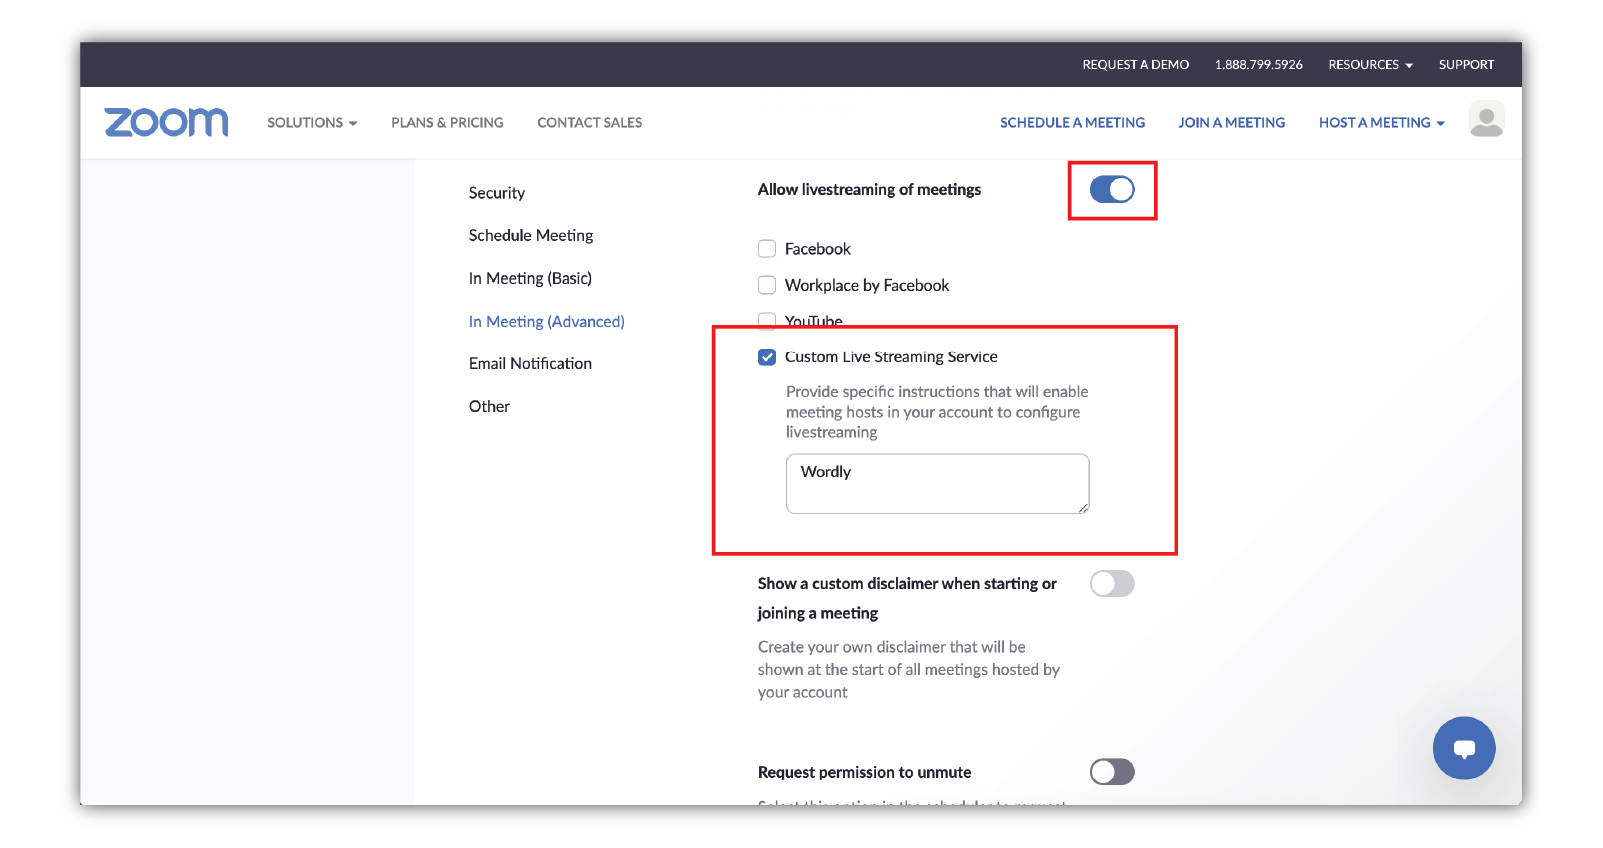
- Make sure “Allow Live Streaming” is on.
- Select “Custom Live Streaming Service.”
Now you should be all ready to go!
Unlinking Accounts
You can easily unlink your Wordly account at any time using the app.
To unlink your Wordly account:
- Open the Wordly App for Zoom in the main Zoom window.
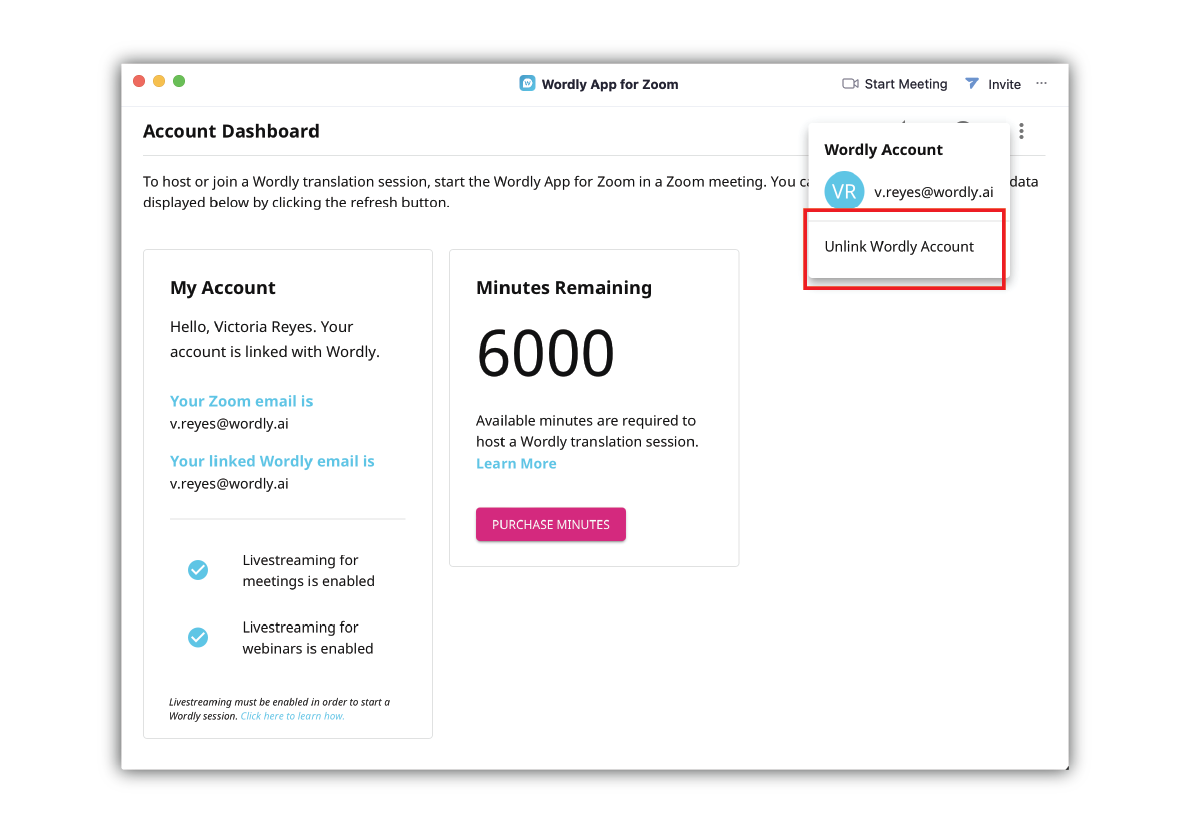
- Click on the “My Account” menu found at the top-right corner.
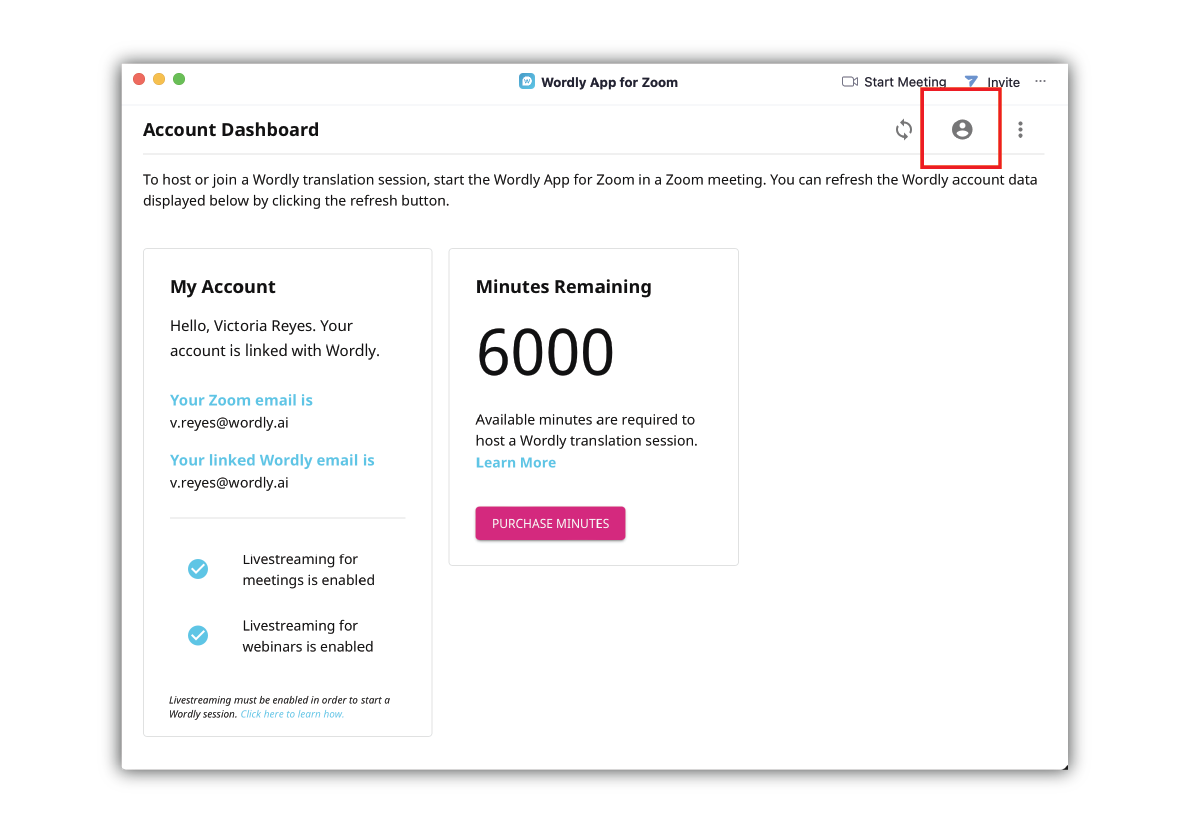
- Click on the “Unlink Wordly Account.”
- In the popup that appears, confirm that you want to unlink your Wordly account.
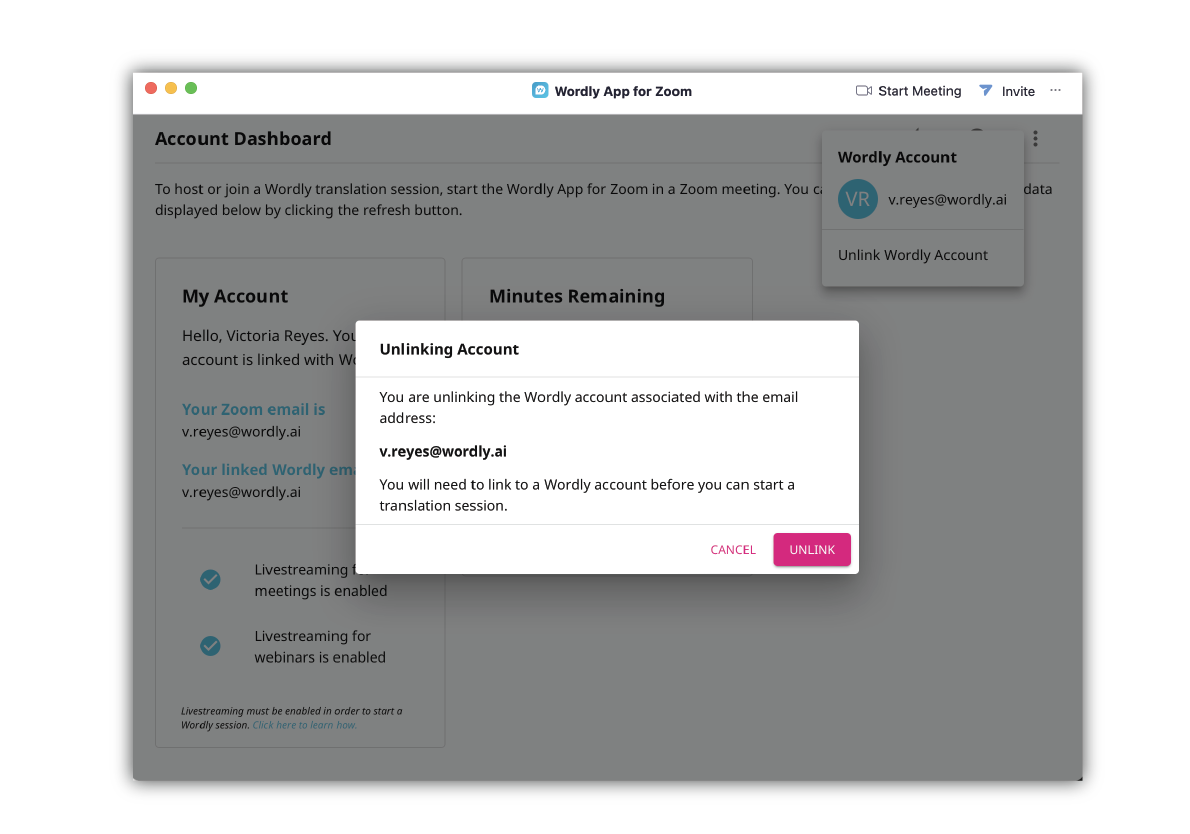
After unlinking your Wordly account, you can link to the same Wordly account or a different one by following the steps outlined in Link With Your Wordly Account.
Important
You will not be able to start a translation session when your account is not linked. You must be linked to a Wordly account before you can start a translation session.Feedback
Was this page helpful?
Glad to hear it! Please tell us how we can improve.
Sorry to hear that. Please tell us how we can improve.